Wednesday, October 28, 2009

I LIKE THE FLOORS


It didn't take me long. I was just over at that side of the house and I already like the floors. It was just such a shock yesterday from beat up floors to perfection. These new floors are really pretty and the color is very similar to what we have upstairs. Okay - I'm happy. Yippity Doooh Dah!

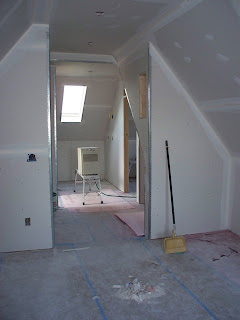
It's rainy today and a little dark over there as it's getting later. I'm not sure the flash worked on some of these pictures but here they are anyway.

Tuesday, October 27, 2009

CHERRY CINNAMON

Sounds good, doesn't it?

Yippity Doooh Dah! Our downstairs floor has been installed. In fact, it was just completed about 15 minutes ago.

Why cherry cinnamon? That's the floor wood species and finish. Cherry with a cinnamon finish. I'll get pictures as soon as I can as it is very dark in that part of the house right now.

Okay - now for the reality check. I'm not sure I like it. Well, I really do like it but I need to get used to it. I've never had a new floor. And the wood is all the same size width. It is so PERFECT. I'm just not used to that but I'm SURE it will be okay once I get used to it.

We ordered the floor through Lowe's and they also subcontract to installers. They swore by the quality of their subcontractors and we went with it. We worked with Zack Buksic from The Viking Floors and were very happy with his work and his professionalism. Here's Zack's info:

Name: Zack Buksic
Company: The Viking Floors, Inc.
Address: 1424 Buffalo Rd., Suite 4, Rochester, NY 14624
Email: zack@thevikingfloors.com
Phone: (585) 328-4995
Fax: (585) 328-0850
Website: www.thevikingfloors.com

Sunday, October 25, 2009

THE HANDY PAINT PAIL


I have found a product I love. It is red, which is one of my favorite colors, so already it has my heart. And - it's American made.

The Handy Paint Pail was found at The Home Depot. I hemmed and hawed about whether I should buy it (it was quite inexpensive, btw), but I did wonder if I was just buying into a gimmick because it had a handle and a magnet (when did they become gimmicks, I ask you?) I decided I didn't care. I had recently painted the shed and had so many cramps in my hand and my thumb actually went numb from holding the brush and a can (or plastic tub) that I threw financial security to the wind - I purchased The Handy Paint Pail.

Today, I used it. I love it.

What's so good about The Handy Paint Pail? Let me tell you -

1. It is small but holds a lot.
2. It is lightweight.
3. It is red.
4. It has a magnet. Why is this good? It holds onto your brush instead of your brush sinking up to its wooden neck in paint. It keeps your brush from swishing around and making a mess as you climb up and down ladders. It keeps your hands clean.
5. It cleans up easy.

It is wonderful. It is red. It is American made. I love The Handy Paint Pail.

Even Dave said, "Hey! That's pretty cool. I might want to use that." No way

Here's their Web site http://www.handypaintpail.com/.

WE ARE GIDDY WITH EXCITEMENT

Yes! We are GIDDY! (Especially Dave.)

We have started painting our interior! Okay - does primer count as painting? Well we have started. As of this minute, the downstairs ceilings are primed, (except for the den), the downstairs bathroom is primed, the "Harry Potter Under the Stairs" area is primed, the hall is primed, and the dining room is ALMOST done being primed. The den is still not primed but maybe I can get to that tomorrow night - we'll see.

It looks wonderful. We are tired.

BAR BAR REBAR


The wall we are building to close in the exterior door will be built with cinder blocks. To assure the base layer will not move, we have inserted rebar into the footing to help anchor the blocks. Once the Quickcrete sets up good, we will place a layer of mortar for the base blocks and place them over the rebar into the mortar.

QUICKCRETE


Yesterday we bought six bags of Quickcrete. It sets up fast. That is what we used for our new footing.

Check out the cement mixer. Dave and I love auctions. Dave has basically outfitted a good portion of his shop from auctions. He has saved thousands of dollars. This particular little charmer is a mixer that he entered into a bidding war with another man. Dave paid $70 for it, which he says may have been high. But when you have two people bidding against each other, that's the way it goes. This baby was buried in the back of the barn. This morning Dave had to dig up some overgrown grass to get the back barn door open so he could get it out. It worked beautifully.

WILL IT EVER BE DONE?


Our basement, that is. Today, Dave and I are making a footing at the bottom of the exterior stairs (or where they used to be). See previous blog about the rubble.

Dave dug out the previous footer as it was very thin. We are now building a wall to close up that entrance and wanted a traditional strong footing for it to sit on. Therefore, the old came out and today the new went in.

AUTUMN AT HARDY HOUSE


It's autumn at Hardy House. These pictures, I'm afraid, do not do justice to the brilliant beauty that was our maple trees this morning.

EMMA THE WONDER DOG


Emma the Wonder Dog! Eats apples (and everything else) making her the strong dog that she is.

Emma loves autumn at Hardy House. One of her favorite things is to eat apples. She doesn't care if they're rotten or buggy. She chows down.

While Emma is eating apples, Betsy is making applesauce and helping Dave.

Saturday, October 24, 2009

What About the Paint?

When we purchased all those samples of paints from The Home Depot, we also later purchased a sheet of drywall. We sectioned the drywall into 16 blocks after we primed it. We then painted each square one of the colors we bought. The idea was we would then cut them apart and move them around the rooms in the house to see how they looked in different light. Well, we didn't really get that far.

We DID pick out the colors we wanted from those we painted on the drywall. But a few nights ago, my daughter's future mother-in-law said she had a postcard from Sherwin-Williams for 25% off all paint and 15% of all paint supplies. Saving a couple hundred dollars sounded great to us so today we went to Sherwin-Williams with our Behr paint chips from The Home Depot and Sherwin-Williams matched the colors. We purchased all the primer we needed and all the paint and supplies. We saved approximately $250 overall. We bough Sherwin-Williams's top-of-the line paint, Duration. It is very low VOC and that pleases us. We hope to start priming tomorrow.

More on the Floor

Yesterday our hardwood floor was delivered to "acclimate" to the house before it is installed on Tuesday. I can't wait.

One of the things we did was painted the floor with Kilz paint to keep down any old paint that might have lead in it. Other than that, though, we are ready for the floor.

And a Little More Rubble...


Here are a couple more pictures of the rubble. What a mess.

Betsy and Dave Rubble


That's right. Not Barney Rubble, but Betsy Rubble.

We have two exterior entrances to the basement. You know - those old bulkhead doors over stairs? Well, we have two of those and only decided to keep one. The doors on both are rotted and leaking (and those will be repaired at some point).

The stairs on the south side of the house are where the pipes are coming in for our geothermal system. In our wisdom, we decided we needed to remove the stairs and also start taking down some of the cisterns in the basement, dig a trench, etc.

The last two weekends, Dave rented a jackhammer and a concrete saw (electric and gas - two different ones). What a job that was! I hope you enjoy the pictures.

Dave took out the rubble and and I got to clean it up...

More Floor

A couple weeks ago we also went back to The Carpet Spectrum to order the flooring for the downstairs bathroom. We decided against hardwood as we felt that bath would get a lot of use from visitors and grandchildren.

We picked an Armstrong flooring. It was really funny because we picked the exact same flooring we had picked out months ago. We did look at several others but kept coming back to this one. It has golds in it, among other colors and it has a leaf pattern. It's neat. It's unusual. It has come in but we haven't picked it up yet.

What Else We've Been Doing

A few weeks ago, Dave and I went on a shopping expedition. We left at about 8:30 AM and returned about 7:30 PM. But, my oh my, did we get a lot done!

First of all, we went to Lowe's and there we picked out our hardwood floor for the entire downstairs of Hardy House. What did we pick? We picked Bruce Hardwood's Kenandell (I think that's it). It is maple with a cinnamon finish. Next we went to Tuthill Lighting to pick up our last three light fixtures. After Tuthill we went to Rochester Colonial Windows and Doors and ordered a new front door. Let me tell you about that...

When we went to Rochester Colonial we went with the idea that we might like to purchase a solid wood, stained door. Well, the salesman would hardly even talk to us about it. We were very surprised but perhaps we looked very, very poor - which we are but he didn't know that. We practically had to yank it out of this guy why we didn't want a wood door. He just said they are substantially more expensive than the fiberglass doors. FINALLY, he told us they started at $3,000-4,000. And, that's without hardware. Okay. He convinced us we really were too poor to afford one of those.

We ended up buying a fiberglass door. It is 2/3 glass and a raised panel lower third. It will be factory primed and painted in white. We have yet to take delivery of it.

After Rochester Colonial we went to The Home Depot. We spent a significant amount of time there. At The Home Depot we ordered four interior doors. They were ALL special order doors so we had to sit with a salesman and work out the details (which side the hole is on for the door knob, which side the hinges are on, which kind of metal finish you want, etc.) because of desires and sizes. It is amazing the differences in costs!

We ordered a pretty standard four panel pine door for the downstairs bathroom. Then we had to have a special door made for the "Harry Potter Under the Stairs" door. That's what I call the door to the basement. It's not a full size door. It will match, somewhat, the bathroom door as they are very near each other.

Upstairs we needed two doors. One door is at the top of the stairs (to keep pets downstairs) and the other door just opposite that one is for the upstairs bathroom. Once again, we want to keep as much light as possible upstairs and since there are windows opposite each other (in the bath and stairwell) I wanted to have glass in the doors. Of course that would not be very private in a bathroom so what we decided to do was have a 15-lite door at the top of the stairs with clear glass and the same door at the bathroom but with glass that is called "frit" glass. It offers privacy but also light. We wanted to get either oak or some other nice wood for these doors as we wanted to stain them. But, the cost was prohibitive. So we opted for pine and we are going to paint them.

Today we picked up three of the doors at The Home Depot. The "Harry Potter" door is not ready yet. The doors look great and I suppose we could stain them if we wanted to. The jury is still out on that one.

The next thing we did at The Home Depot is we took our color book with the schemes that we thought we wanted in the house and purchased 16 different paint samples. It's awesome. For less than $4 a sample you can have them mix any color paint you want. Sure it costs a little but it was a great way to see the colors.

It was a long day but we got a lot accomplished.

A Look at Fall from Hardy House


I just thought I would post this picture to give you an idea, again, of why we are doing this. We love the change of seasons and out here at Hardy House you really see the weather. I think I took this picture at least a week ago. I would say we are just past peak foliage now. I was headed on a quick jaunt around the barn with my camera and, well, it was a really nice day. :)

And a Few More Pics


Here are a few more pictures of the newly hung drywall.

Excitement at Hardy House


The week after Labor Day was very exciting for us at Hardy House. That was the week the drywall was delivered. It came in through the upstairs window and through the front door. I, personally, was very, very happy.

Our friendly contractor, Jerry Knibbs, told us the drywall would take about 2 1/2 weeks to complete. By golly, I was so excited I asked friends over for dinner, scheduled for October 7. Well, I had to cancel those plans. We went into a rainy and cold snap and the drywall just wouldn't dry. The "guys" finally called the drywall finished two days ago--almost 5 weeks from start to finish. The pictures here were taken at different times during the hanging of the drywall. I'll put up more later now that it's finished.

Floor Patching


As said before, we were able to salvage the floors upstairs but not downstairs. We decided to go with hardwood floors downstairs but before that could be done we knew we needed to get the floors fairly level.

Some of our floors literally had holes in them. Those mostly were from where the old vents had been. We needed to fill those and figured the best way to do that was to use inexpensive hardboard as it wasn't very thick. It worked like a charm. We had 3 or 4 of these holes to fill.

Still in the Bathroom


This first picture is of the backside of a marble toilet base. Why? You say? Well, because we have wood floors in the bathroom we want to make sure that any moisture from the toilet (though we hope there won't ever be any) and any accidental misses (we also hope there won't be any of those, but you know how grandchildren can be...) will not damage the floor. You can pick up these marble bases in some home or hardware stores but we found Lowe's does NOT carry them. Our HEP dealer in Newark did, however. We purchased two of them - one for upstairs and one for down. In this first picture we are carefully cutting off the plastic covering from the bottom only. We wanted to keep the plastic on the top to further protect it until the bathroom is complete.

The second picture shows Dave starting to apply construction adhesive. NOTE: we already placed the base on the floor and measured it then measured the corners with painter's tape so that after we applied the adhesive we would know exactly where to place the base again.

The third picture shows the base after Dave applied more adhesive. Do you think he got enough on there? LOL. That base isn't going anywhere...

Whata Shower!


Okay - well it's ALMOST a shower. At least the base is installed.

The other picture is looking from the dressing area through the studs into the bathroom. It gives you an idea of the plumbing and the wiring that was put in.

Goop, Press, and Place


Looks like a large spider web, doesn't it?

We took the base back out because we had to add adhesive to the bottom of the base before we permanently placed it. That dark stuff is the construction adhesive. Once that was applied, we flipped the base back over and put in place. If you install a shower base, don't be surprised if you have to use shims to make sure it is placed perfectly.

Set, Measure, Place


Yup. That's the shower base. I tell you, this shower has required so much work and it's still not all in. I sure do hope it's worth it!

Here we have temporarily placed the base on the plywood base we installed (and in which we cut the hole).

Next we leveled the base. Once we felt we had it leveled we also needed to make sure the water would drain down the drain as it was supposed to. Hence, the picture of Dave dumping water in the base. NOTE: remember to either have someone hold a bucket below or make sure there is a bucket below to catch the water. Everything with our shower base seemed to be


set properly.

Then we had to remove it.

Shower Power


In September Dave and I were able to install the shower base in the upstairs bathroom. As usual, we couldn't just put the dang thing in. Nope. We also had to reinforce (box in) the area where the plumbing was going to be (the ceiling of the den). Then we had to cut a round hole for the shower drain and hoped to you know who, that the hole wasn't going to hit the boxed area. Well, we pretty much DID hit the boxed in area but only just. We were luck.

The first picture is looking up at the den ceiling where the hole was being cut. The second picture shows Dave cutting the hole. We hat the Ryobi jigsaw. The blade kept moving. It was my Christmas give to him a couple of years ago and I was jobless. So I went cheaper and now we are paying for it in other ways. He'll get a new one eventually...